

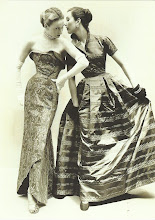
Now, I don't profess to be a very good seamstress, you just need to look on the reverse of my dresses to realise that. However, I am improving with every new garment I add to my collection!
My lovely friend Jodie recently asked me how to make a fabric belt to compliment a vintage outfit, in her case she will be using material cut off the length of a vintage dress to make the matching belt. I thought, why not post the info right here at Alice Jeans for anyone else to refer to. Up until a couple of months ago I was quite daunted at the idea of making a fabric belt myself, but plunged in just the same and discovered was so much easier than I imagined - so here goes - forgive me if you are brilliant seamstress...there will probably be things I am doing wrong, but I have been happy with the results just the same!
(These instructions assume at least some knowledge of a sewing machine, and basic sewing, edging, and neatening skills.)
You will need:
1. The ladies at my fabric and craft supply store did not know of any particular name for this, but I will describe it as 'Fabric belt inner stiffening' - explain to your local supplier what you are after and I am sure they will be able to help. It looks like thick, stiff white tape. You will require your waist measurement plus about 20cm extra for overhang.
2. Length of fabric to accommodate your tape plus about 7cm for end. It will need to be twice the width of your tape, plus seam allowance.
3. Belt buckle of choice, with hole large enough to thread your belt tape through.
4. Thread
Step One
Step One
Fold material in half with wrong side facing outwards and tape laid inside against the fold. Pin (or baste if you prefer) along edge of tape so that both sides of fabric are pinned together - do not pin tape, you should still be able to slide tape out. Your material should be approx. 5cm longer than your tape. Take tape out and sew along pin line.
Step Two
Sew one end of fabric to close. Then turn tape inside out through open end.
Sew one end of fabric to close. Then turn tape inside out through open end.
Step Three
Insert tape into pocket. It should be a lovely snug fit.
Step Four
Fold open end over once and sew in place.
Step Five
Place belt buckle right side up on the inner side of your belt. Fold end of fabric over belt buckle 'stem' and hand sew into position. Almost finished now !
Step Six
If you wish you can make a holder for the belt overhang by hand sewing a little fabric loop onto your belt in the position that suits your particular belt best.
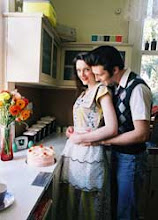
Well done - you now have a lovely little finishing touch to your favourite vintage look garment ! Matching fabric belts really polish an outfit off perfectly !


Thanks Gabrielle. Am so lucky to have found this. Hope you get some that you like...Jean Belts
ReplyDelete